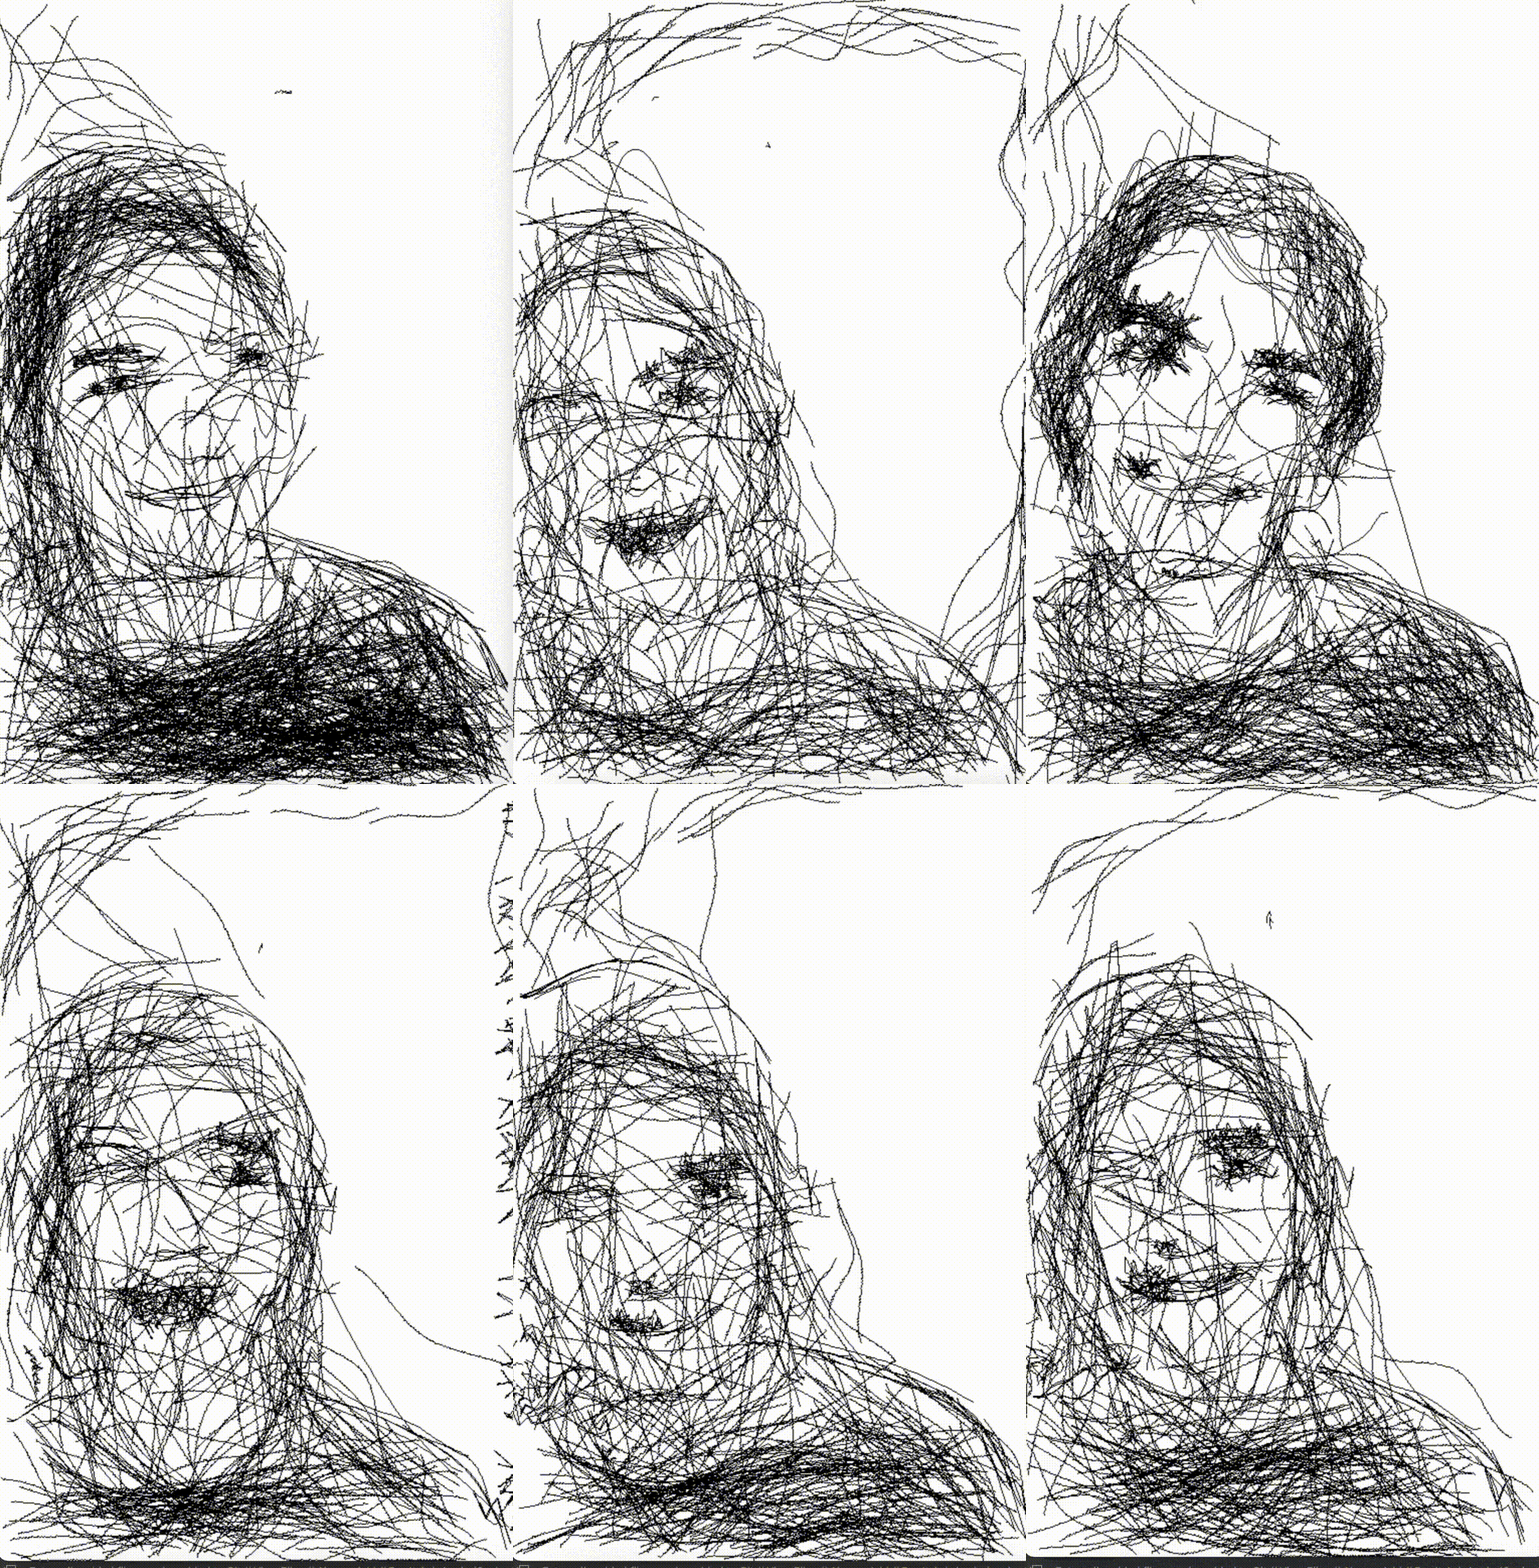

October 2020, I visited Wonderspaces Philadelphia where I saw Patrick Tresset’s art exhibit HUMAN STUDY #1, 3RNP. The exhibit featured a robotic arm that would sketch stylized portraits of visitors who sat in front of it. The process took around twenty minutes and the sketches were pen on paper. I was mesmerized by the process -I kept wondering and postulating on how exactly the robot worked most of that afternoon and intermittently over the course of many months leading up to this project. When given the open ended prompt of a senior capstone project for my Computer Graphics degree at Penn, I immediately thought of this.
overview
Sketch Artist is a program that takes in a portrait photograph and outputs a stylized drawing, resembling the work of a portrait artist. This project was completed during my final semester at Penn with my friend and classmate Sydney Miller. We built this project for our senior capstone project required by our Computer Graphics program, Digital Media Design. We heavily referenced the paper Portrait drawing by Paul the robot by Patrick Tresset and Frederic Fol Leymarie while building this project. Lastly, this project was completed under the guidance of Dr. Norman Badler and Professor Adam Mally at the University of Pennsylvania.
Above is a brief extension of this project. Stills from a short video were used to create an animation.
The aim for this project was to build a program that took in a portrait photograph and output a stylized drawing, resembling the work of a portrait artist. We wanted to capture and represent the qualities of hand drawn sketches in our computationally based program.
The process of implementing this project took four main steps:
Pre-processing the Input Image
Extracting Salient Lines
Shading
User Parameter Control
Pre-PRocessing INput IMage
The first step for this project was to apply some pre-processing steps to the input images. This specifically involved gray scaling and cropping the images and applying face detection using python packages. Through these steps, we achieved relatively consistent “zoom level” across faces, regardless of the exact input image.
Salient Line Extraction
The next step of this project was to creating a basic line drawing. The process for doing so involved the following steps:
Creating a pyramid representation of the images
Applying a gabor kernel to each image
Extracted the connected components from each image
And finally, thinning these components
Pyramid Representation
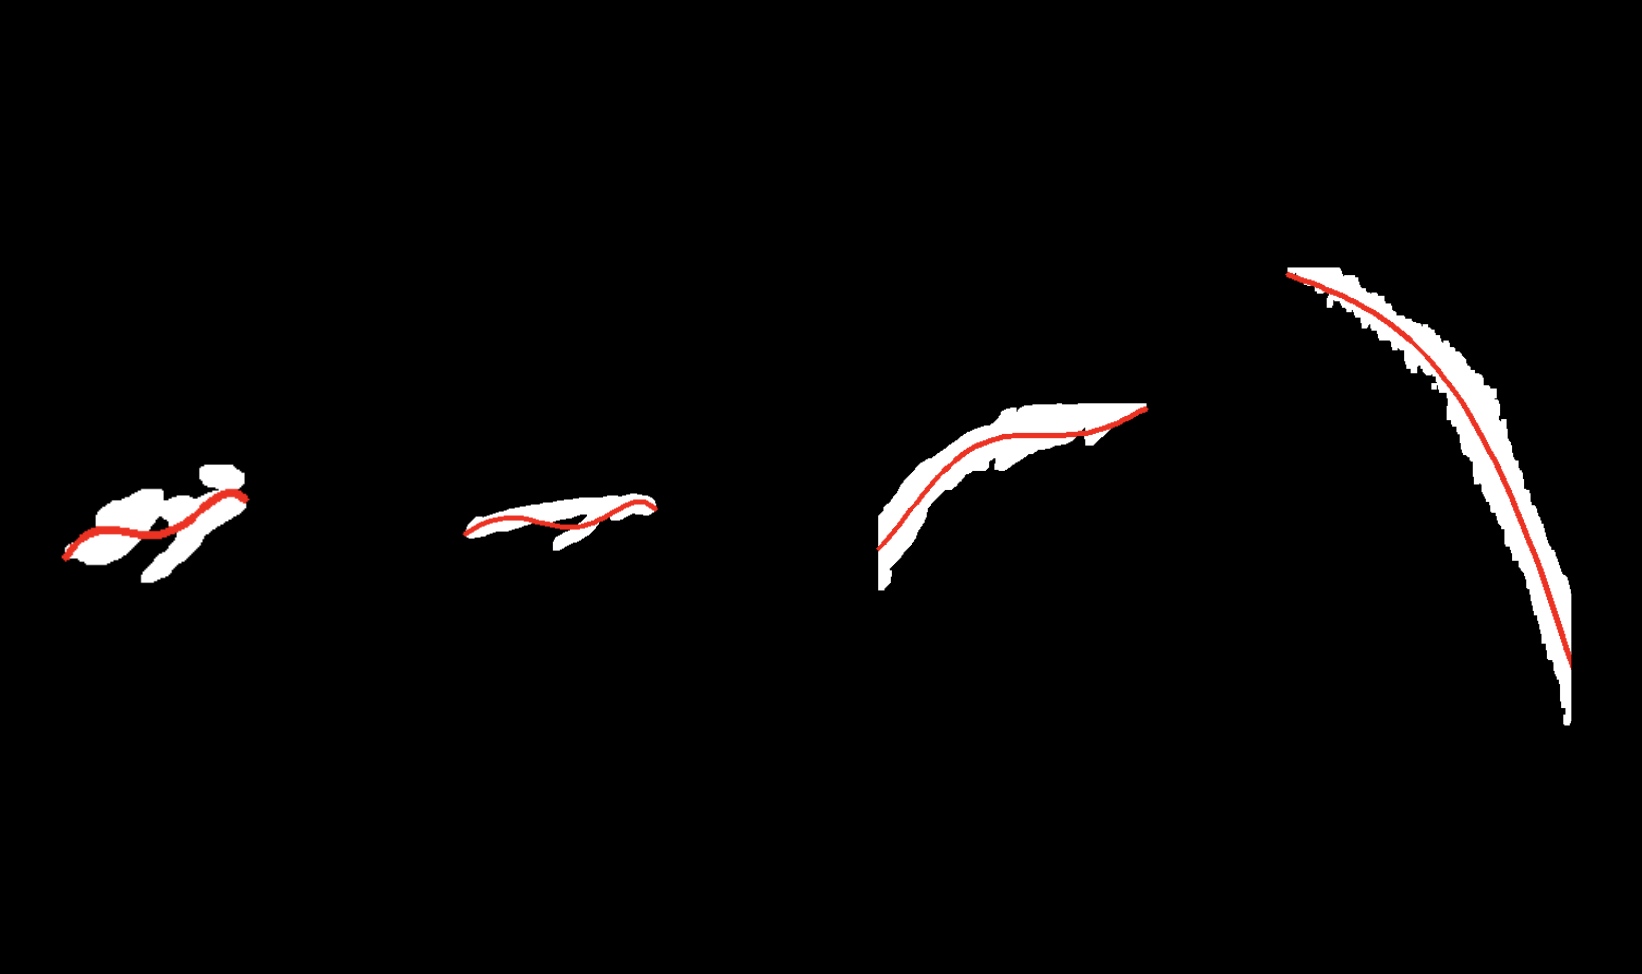
The pyramid representation process involved taking the input image and iteratively average pooling it such that we had four images of different sizes. Then, for each of these images, a gabor filter was applied at various angles. Lastly, the images were thresholded such that the filtered portions were more salient. In the images below, we see the thresholded images from various angles.
Skeletonization of Connected Components
Once connected components or blobs were extracted, we identified the largest contour and created a polynomial to fit the contour. The challenge in this step was to have the line go through what is the visual “spine” of the blobs, independent of orientation. Many medial axis packages exhibited a branching effect along the line which was not a visually desirable output.
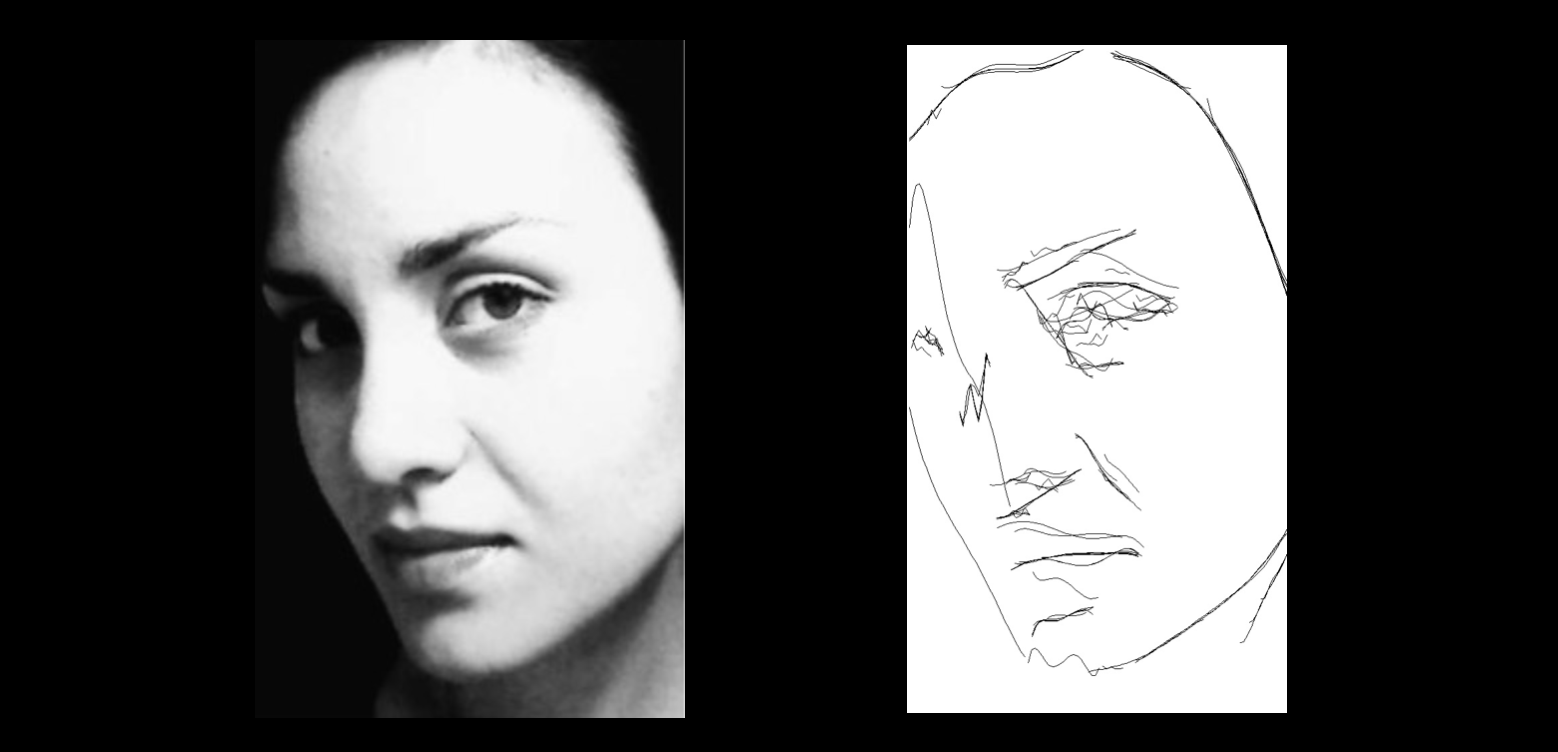
Final Output after Line Extraction Algorithm. Here, we are able to recognize key facial features.
Once we had a line drawing that visually represented a line drawing, we began the next major phase of our project, shading.
Shading
Our shading algorithm can be summarized with the following steps:
Histogram-Based Thresholding
Connected Component Extraction
Creating Point Set
Connected Points into Oriented Splines
Perturbing Points
HISTOGRAM-Based THresholding
First, we separated out the darkest 60% of the image. This percentage was chosen based on what we perceived to be the most visually pleasing. Then the remaining pixels were placed into “buckets” using a histogram. The boundaries of these buckets then served as our thresholds. In the images below, we see that the “bucket” that represents the darkest shade changes per image. This way images are shaded evenly, regardless of their average brightness.
Generating Point Set
To generate a point set, we iteratively added random points to the point set while simultaneously plotting and connecting the points on an error image. We terminated this process when enough pixels on screen were shaded on the error image. This pixel count was arbitrarily set based on visual aesthetic.
When a new point was being added to the point set, the following criteria had to be met:
Distance Range - The current point is within a set distance range of the previously selected point, determined by the blob’s area.
Orientation - A majority subset of these points follow the general orientation of facial contours.
Orientation
The lines that met the orientation criteria had to follow average orientation of the in the original image at the current point. Then, each line was curved by moving the midpoint along the normal of the orientation. Lastly, the points were perturbed to give them a pencil-like feel.
We found that some randomness and some orientation best achieved our visual goal. Our final model orients a portion of the lines but not all.
Visual of point generation process via error image
Orienting some, but not lines created the sketch-like look.
User Parameter Controls
Users are able to customize output by setting the parameters in a separate file. While our default parameters work well on most images, fine-tuning parameters definitely can help improve performance on certain images. Lastly, many of the following parameters were set to what we found aesthetically pleasing, therefore we wanted to give users the opportunity to fine tune the parameters to match their desired style of sketching.
Some implemented parameters include:
Number of Lines
Line Length
Curve Amplitude
Curviness
Number of Oriented Line
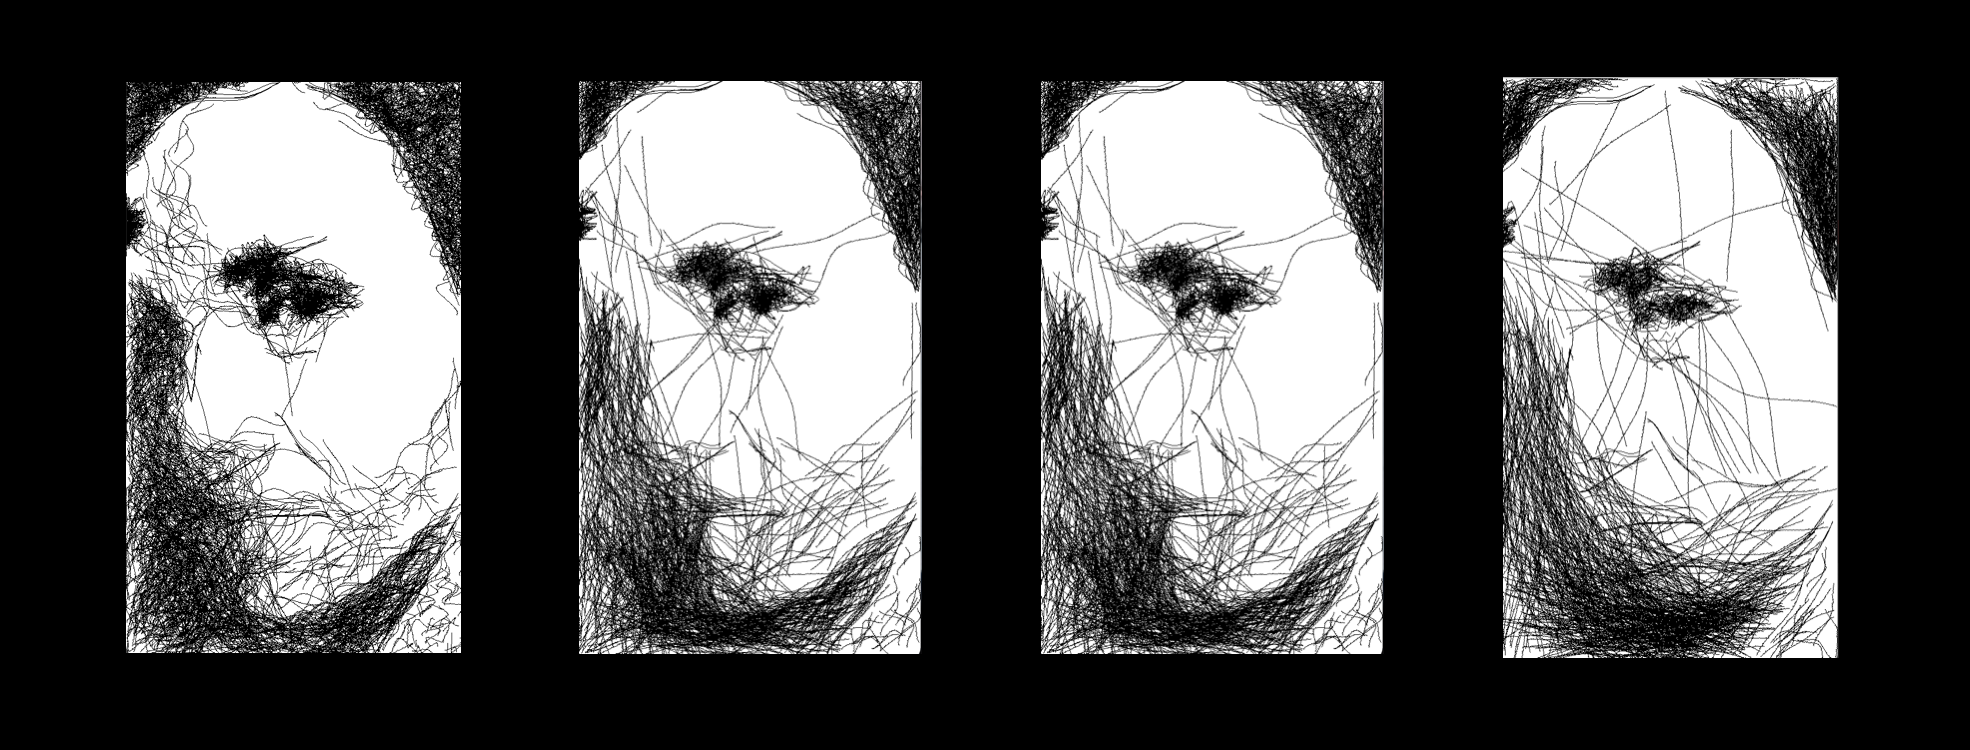
Number of lines
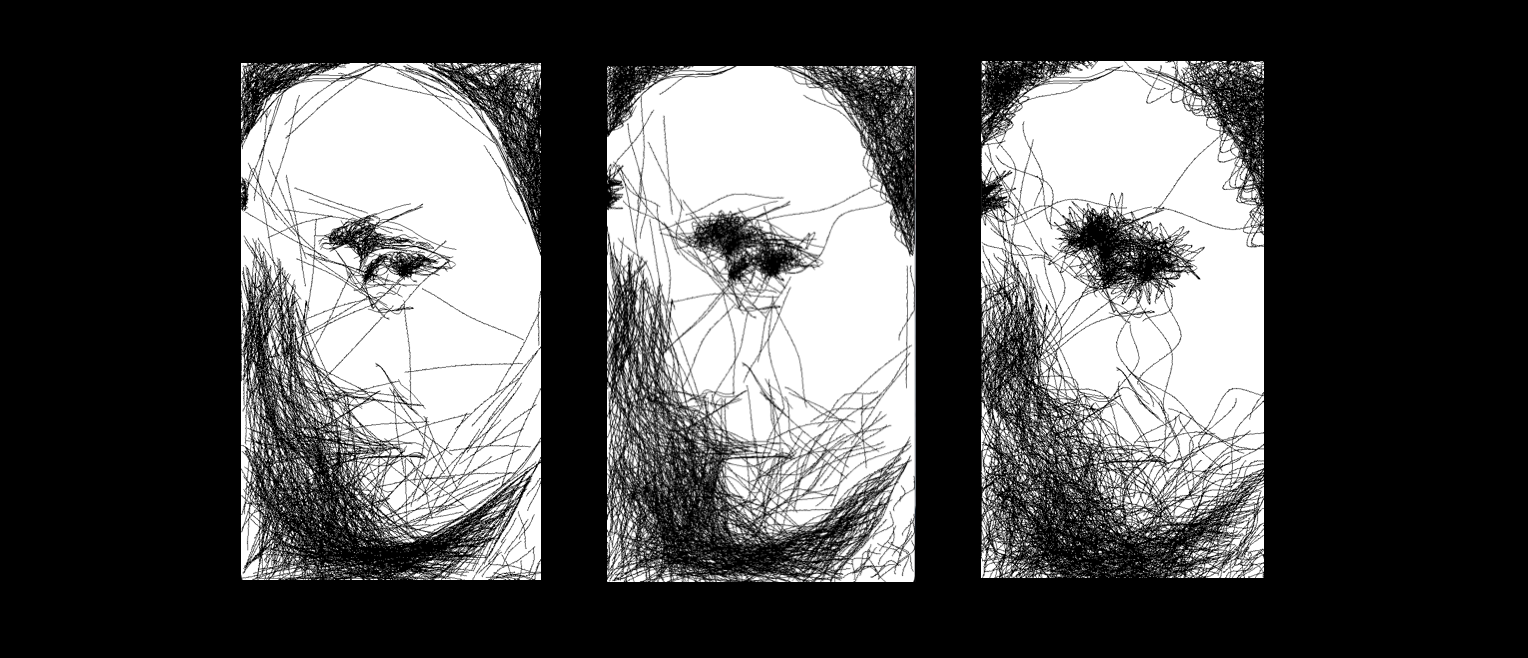
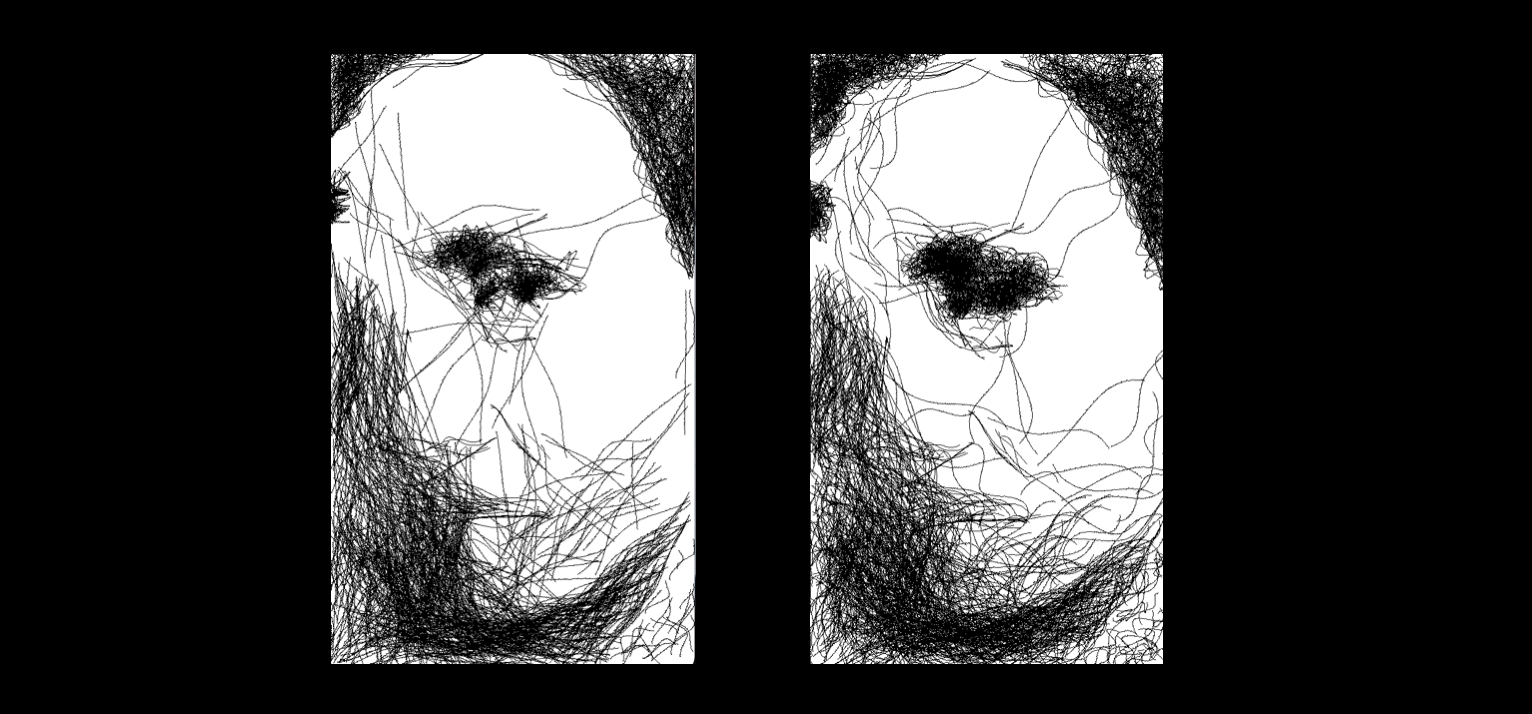
The image on the far right has the most lines and its shades are much darker. In comparison, the image on the left is much more subtle.
Line Length
Here, we notice more detail in the image with shorter lines. We also see a textural difference in the line strokes across these images.
Curve Amplitude
The results range from almost a straight line to a very curved line.
Curviness
This parameter controls the waviness of the lines.
Final Results
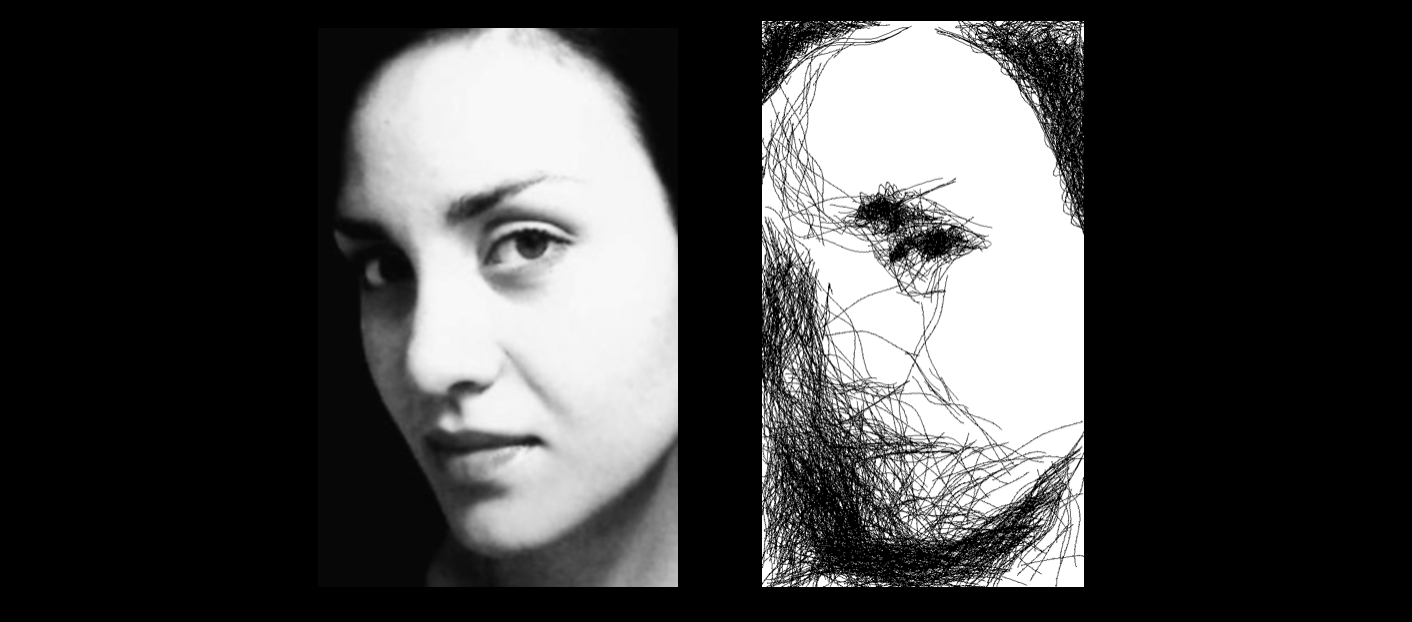


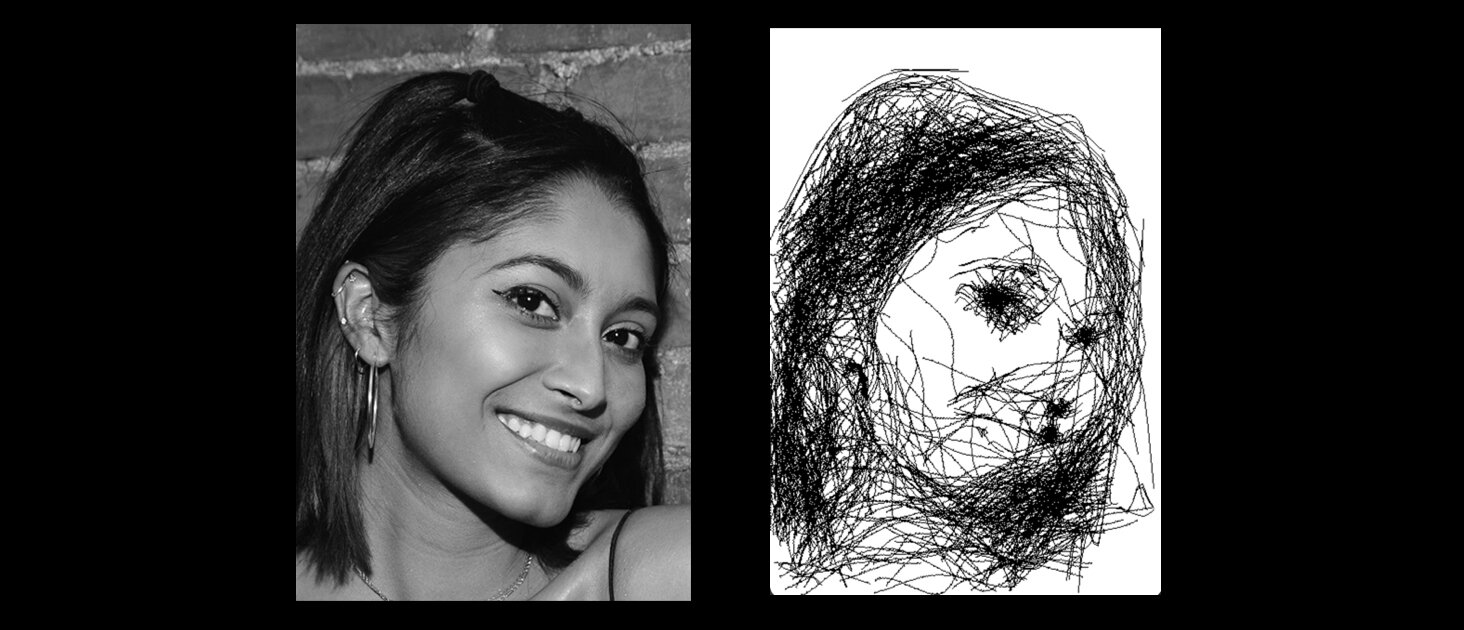
Comments on Final Result Images:
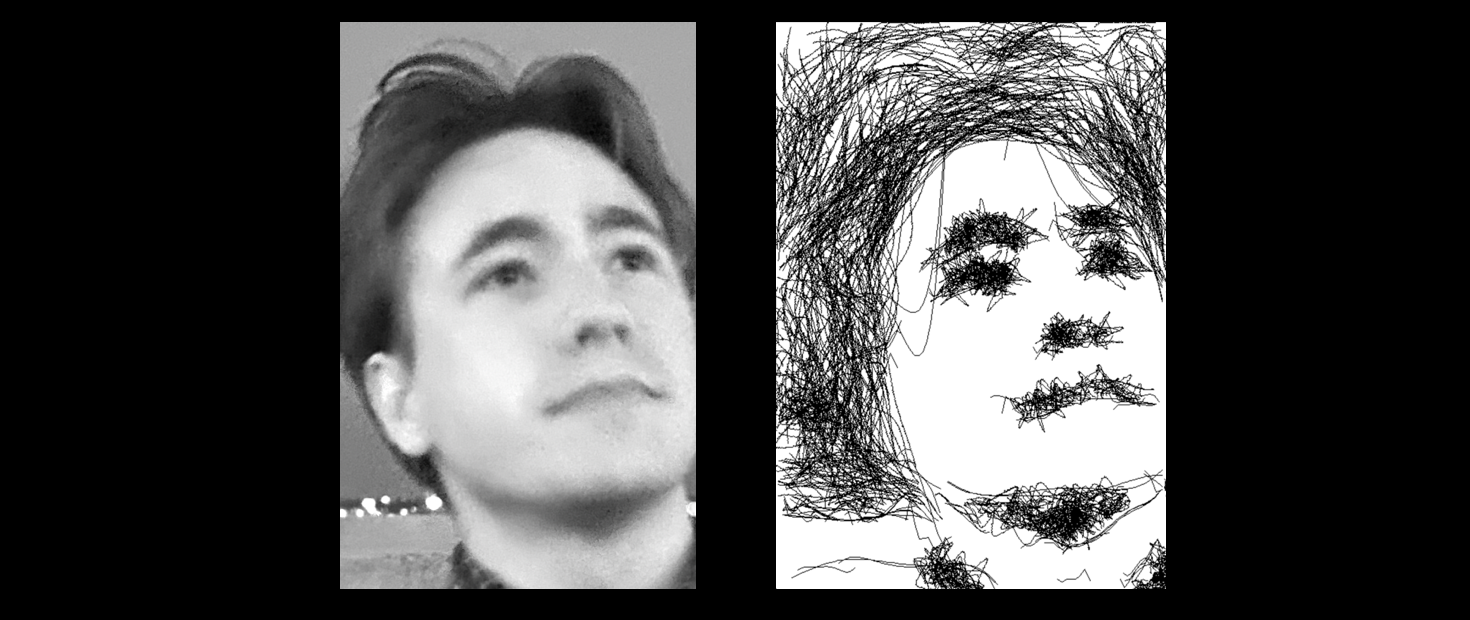
1 - The first image shows our final results for our test image.
2 - By tweaking the parameters, we were able to get a more windy and scribbly look in the second image. Here, we see that the directionality of the hair is captured by the algorithm.
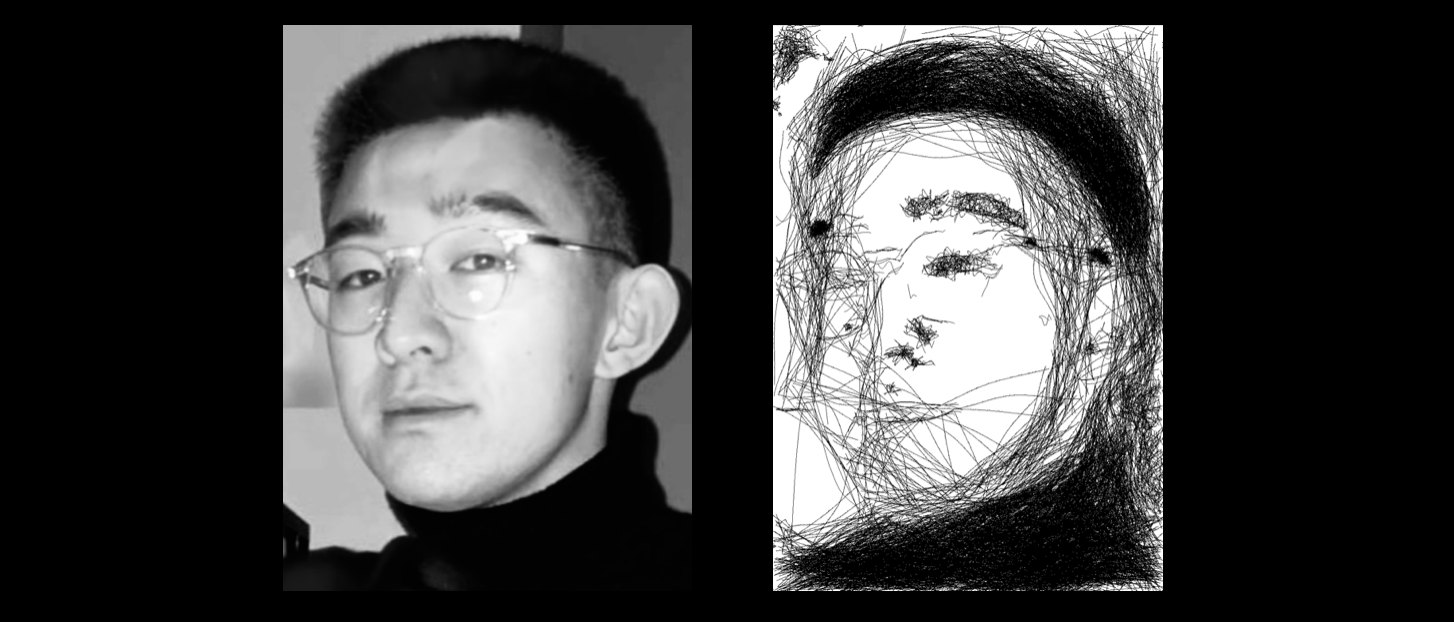
3 - We were impressed that the algorithm was able to pick up on the clear frame glasses in this image. The likeness of the figure is captured well.
4 - This is the most abstract output. Yet, the likeness of the figure is still captured and the key facial features are salient. This result image also tested the performance of our algorithm on darker skin tones.
